Welcome to the Remus-Tips Blog. If you are a user of the OpenSource PIM Remus Information Management you'll find some interesting tips and tutorials for Remus, If you want more information visit the official project site http://remus-software.org
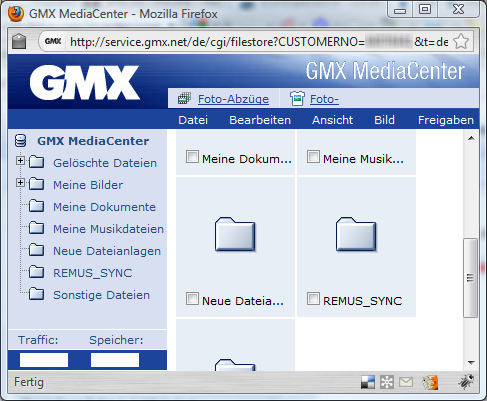
Are you using Remus at home and at work and want to keep several folders in sync? - No problem if you have a GMX or Web.de Account (two big freemail-provider). Both are offering online space (GMX 1 GB, Web.de ~120MB) which are accessible via the WebDAV protocol.
First you have to login into your freemail account and create a new folder where all the Remus stuff will be stored.
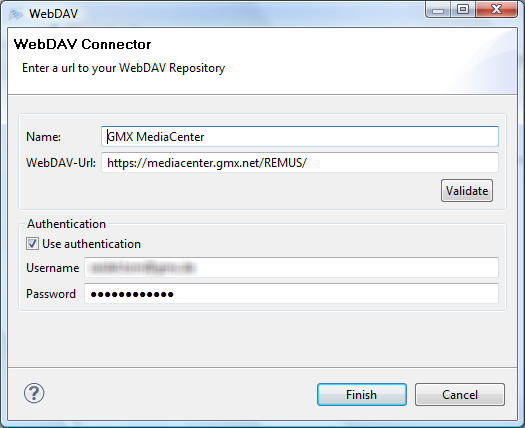
Afterwards you can create a new WebDav Connector pointing to your GMX or Web.de online folder
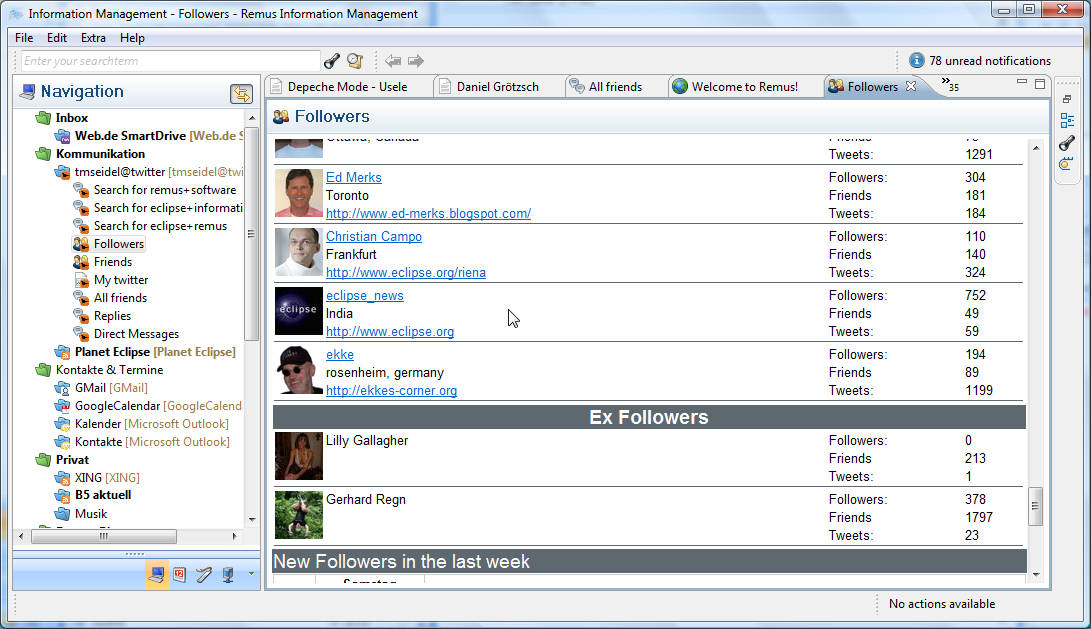
If you want to know who stopped following your twitter-stream, open the "Followers" Information Unit and scroll down to the headline "Ex-Followers". To know who stopped following you can be very helpful to improve the quality of its own feeds.
The same information is also available for the the people you follow (see "Friends")
The following is a collection of often used shortcuts:
While browsing Ctrl+T - Open a selector for fast opening Ctrl+M - Maximizes/Restores an editor Ctrl+F6 - Naivgation through your opened information units Ctrl+E Jump to another open information unit Alt+Shift+T Synchronizes the current selection in your navigation Ctrl+W Closes the current information unit
While searching Ctrl+→ Jump to next result Ctrl+← Jump to previous result
And of course the standard shortcuts for Undo/Redo/Cut/Copy/Paste/Delete/Rename are also working
The following article should you how to create a zip package from your desktop with one single drag and drop. Remus has built in a very simple rule engine which is coupled to a Groovy interpreter and enables you to execute custom Groovy Scripts. The creation trigger of a rule is always a drop or a paste of data into the desktop panel of Remus.
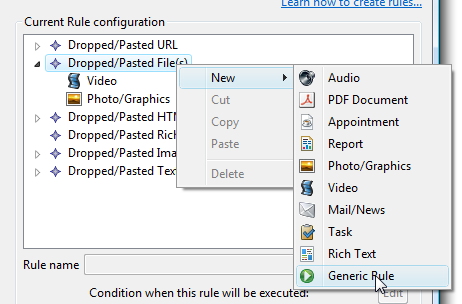
At first you have to setup a rule which is executed when dropping files into the application. Go to Extras → Preferences → Remus → Desktop Integration → Rules
You'll see an overview which rules are executed at specific triggers. Now you can add a new "Generic Rule"
After the new Rule was created the rule can be renamed with a meaningful name and a dialog can be opened to modify the script which is executed.
Now the application is ready to zip your dropped files. Just drag and drop the desired files or folders into the drop-section, select the created rule and you're ready to go.
Using Groovy gives you much flexibility. An example how to manipulate the resulting zip File name:
String fileName = new java.io.File(input[0]).getName();

zip(input, "C:\\Users\\tom\\" + filename + "_zipped.zip");
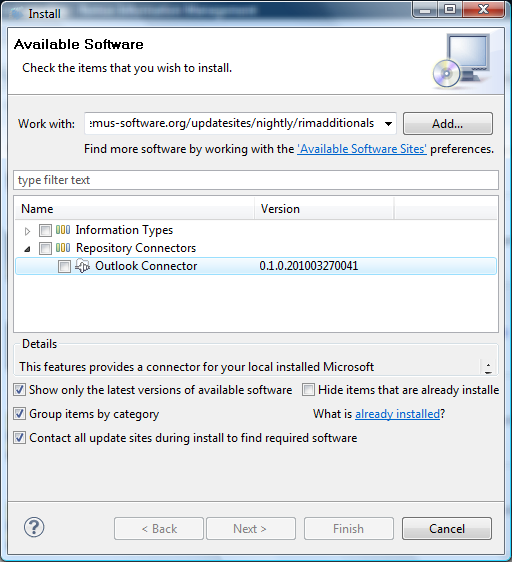
If you want to switch from Outlook to Google or from Google to Outlook for your contact management you have to transfer the existing contacts from one platform to the other. Remus offers for both repositories a connector, so Remus can be used as a transferring tool between the two platforms. The Outlook connector is not installed with the initial download, you have to install this package separately (Go to "Extras" → "Install new software")
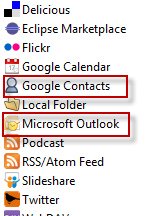
After you have installed the outlook connector you'll see both connectors when creating a new connector.
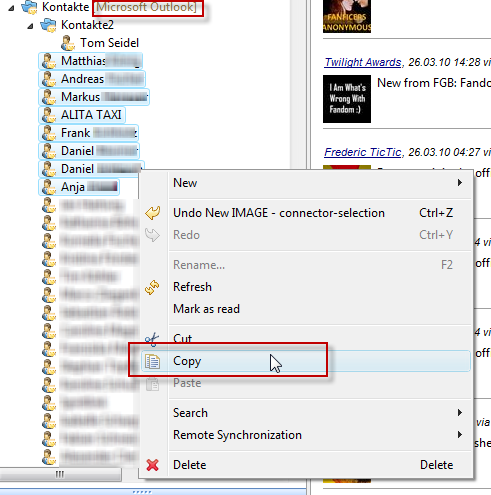
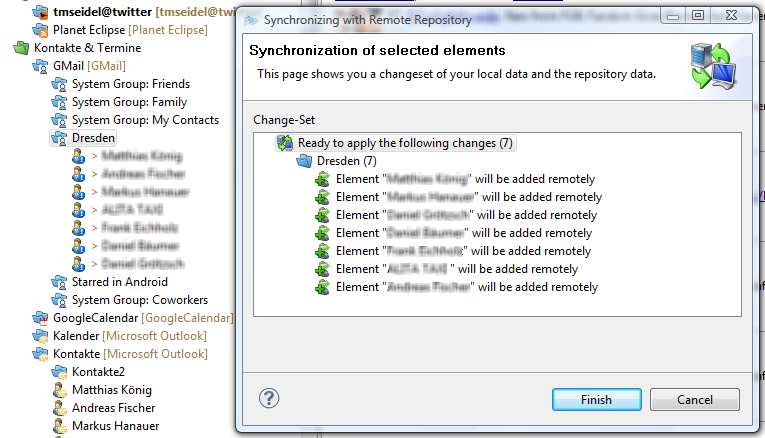
Now you can checkout both repositories; the contents will be shown in your navigation. Now Remus has imported your contacts from both repositories and keeps them in sync whe you modify a contact, create a new or delete an item.
With a simple copy-past operation you can now copy your contacts from one repository to another.
After copying the items to your target repository just hit "Synchronize" and commit the changes. That's it.